|
| This is an example of pants that need a drawstring added. They are about 2" too big. |
Ever buy your daughter a new track suit that is just darling? You buy her normal size...the jacket fits perfect, and the length of the pants is perfect, but the waist is
way too big? I have had this happen too many times to count and for some reason they don't make little girls pant waists adjustable. Yes, they may have elastic in the waistband, but they still sometimes won't cinch down enough and the pants fall down. So I've been trying to figure out a way to fix many pairs of my daughter's "comfy"pants so she can wear them sans the safety pin in the back. (it's just not attractive to have a big ole safety pin gap in the back, not to mention the thought of that thing ever coming undone..
.ouch!) And the old stand by trick of making a tuck in the back doesn't usually work either due to the fact that the waistbands are usually
so thick. So here's what I do to solve our little problem. If you have tall, skinny kids maybe it will help you too! I just made a way to add a drawstring to the existing waistband using eyelets that I inserted into the front of the waistband. I left the original elastic in the waist and left the original waistband in tact. (But keep in mind that you must make a hole in the back side of the front of the waistband so that the eyelets can be inserted. But you then sew up the hole and all is well.) I just allowed a way for a drawstring to be inserted for added tightening of the waistband. It has really helped several pairs of pants fit better and be more functional! The kids have no more fear of "child eating safety pins" and I have no more fear of them taking off running and their pants hitting the floor!
Items you will need:
"Comfy Pants" that are too big in the waist. The waistband has to allow room to feed a (In my best Nacho Libre impersonation "these are my stretchy pants!")
Dritz Large Eyelet Kit (Found them at Joann's, comes with eyelets and the small tools to make them work)
Hammer
Small Safety Pin (small enough to fit through the hole of the eyelet, to attach to the ribbon to feed through the existing waistband when you have inserted the eyelets)
Ribbon, or other similar product to be the new drawstring. (I used small grosgrain ribbon and burned the ends with a flame so they didn't fray.)
Needle and Thread that matches the fabric of the pants. (To sew up the hole you will create on the back side of the waistband by inserting the eyelets)
Seam Ripper (in case you need to unpick any stitches of the original waistband or it's embellishments)
Disclaimer for all photos: The woman seen here (me) has a very bad and long over due manicure! Please keep in mind that I only paint my fingernails for church on Sunday and today is Saturday, so they are
really bad!! So please try to ignore the nail polish chipped fingers.
Here's What You Do:
Here is the eyelet kit I used for today's project. There are instructions on the back of this package that are more in depth on how to make the eyelets work if you need further instructions on this step. This kit also includes the silver tool and rubber stopper that is needed to make this work.
This is what the original pants look like in the front. They already have what appears to be a drawstring, but it is just for show, it doesn't have function. So we shall call it a "faux drawstring" I cut off the ties flush with the waistband. (You could try to unpick, however I have tried this and because they sew it
so well I have realized that it is best to just leave in place and cover it up!) When I tried at first to unpick all the stitches I ended up making a big hole. You may do what you like. (Maybe you are better or more patient with unpicking than I am, LOL!)
This is a front view of the pants with the "faux drawstring" removed. You can see where it was, but I just put the eyelets just to the outsides of each one so when the new drawstring bow is tied it covers what is seen here.
(Sorry about the glare on this one!)
Then snip a very small hole where you want the eyelet to go. I just used the tip of the scissors to snip a
very small hole. (You can always make the hole bigger, but you can't make it smaller.)And knits stretch
, a lot so snip small and then the stretch of the knit should allow the eyelet to fit in.
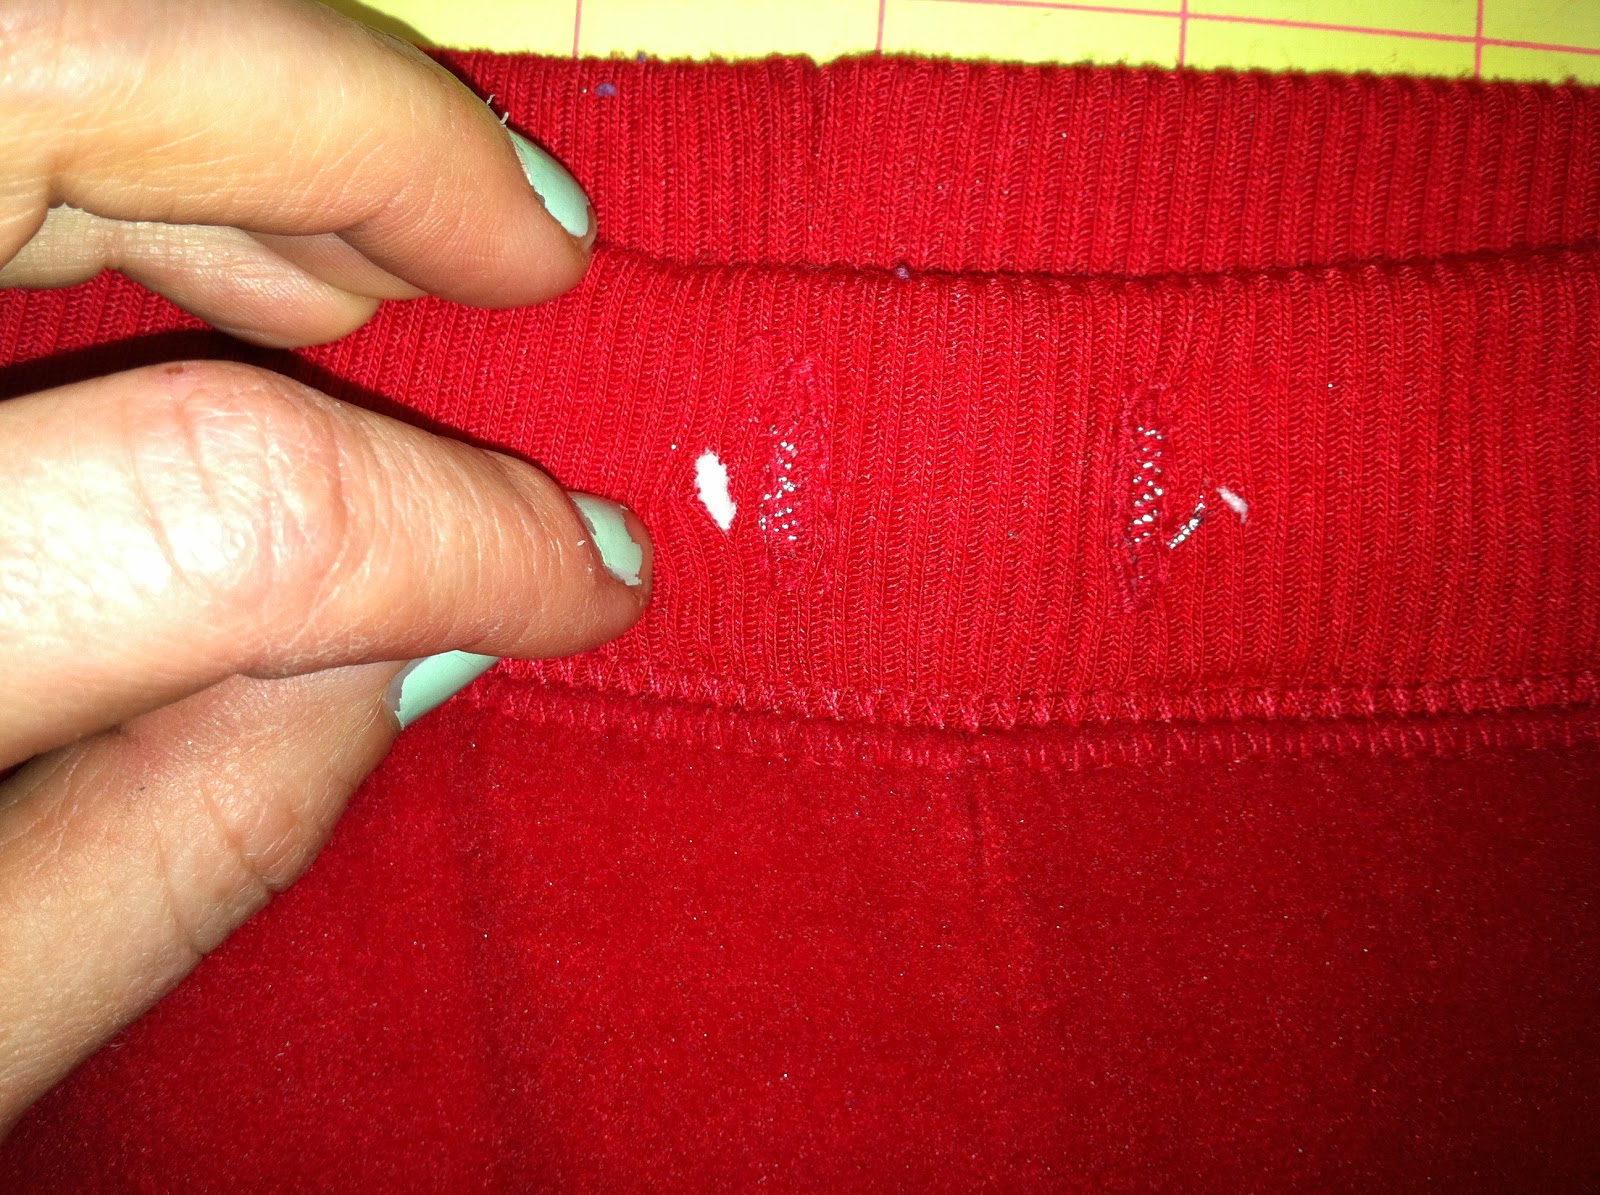
Now, in order for this to work, you have to be able to work from the back side of the waistband.(To put the other eyelet on the back side of the front of the waistband.) And since it is already sewn up, you need to make a hole. I just make a straight slit with my scissors about 2 inches long and then I can get in there to place the other eyelet.
Now you insert the longer of the two eyelets through the hole you made in the front of the pants, then working from the back side, put the other shorter eyelet on top of the long one and then use the tool and hammer to close the eyelets, trapping the fabric from the front side only in between the eyelets.
This is what it looks like with both eyelets secured.
Now sew up the cut we made in the back side of the waistband. I just used needle and thread.
Next step is to put the safety pin through the end of the new drawstring (the ribbon or cording, whatever you chose to be the new drawstring.) The safety pin is going to feed the new drawstring through the eyelet, all the way through the waistband and back out the other eyelet. The safety pin has to be small enough to fit through the eyelets, but the longer the safety pin the better (because it feeds faster)
Here I am inserting the safety pin that is attached to the ribbon into the eyelet. Then use your fingers to push the pin through the waistband by bunching fabric up on the pin then grabbing the pin and pulling it until you are all the way back to the other eyelet. This is where the longer the pin the better, it allows more fabric to be bunched on it which makes things move faster.
Here the safety pin has made it all the way through the waistband and is poking out through the other eyelet. (Just make sure you have the drawstring long enough that the end (not attached to the safety pin) doesn't go into the eyelet/waistband. (Then you would have to start over!)
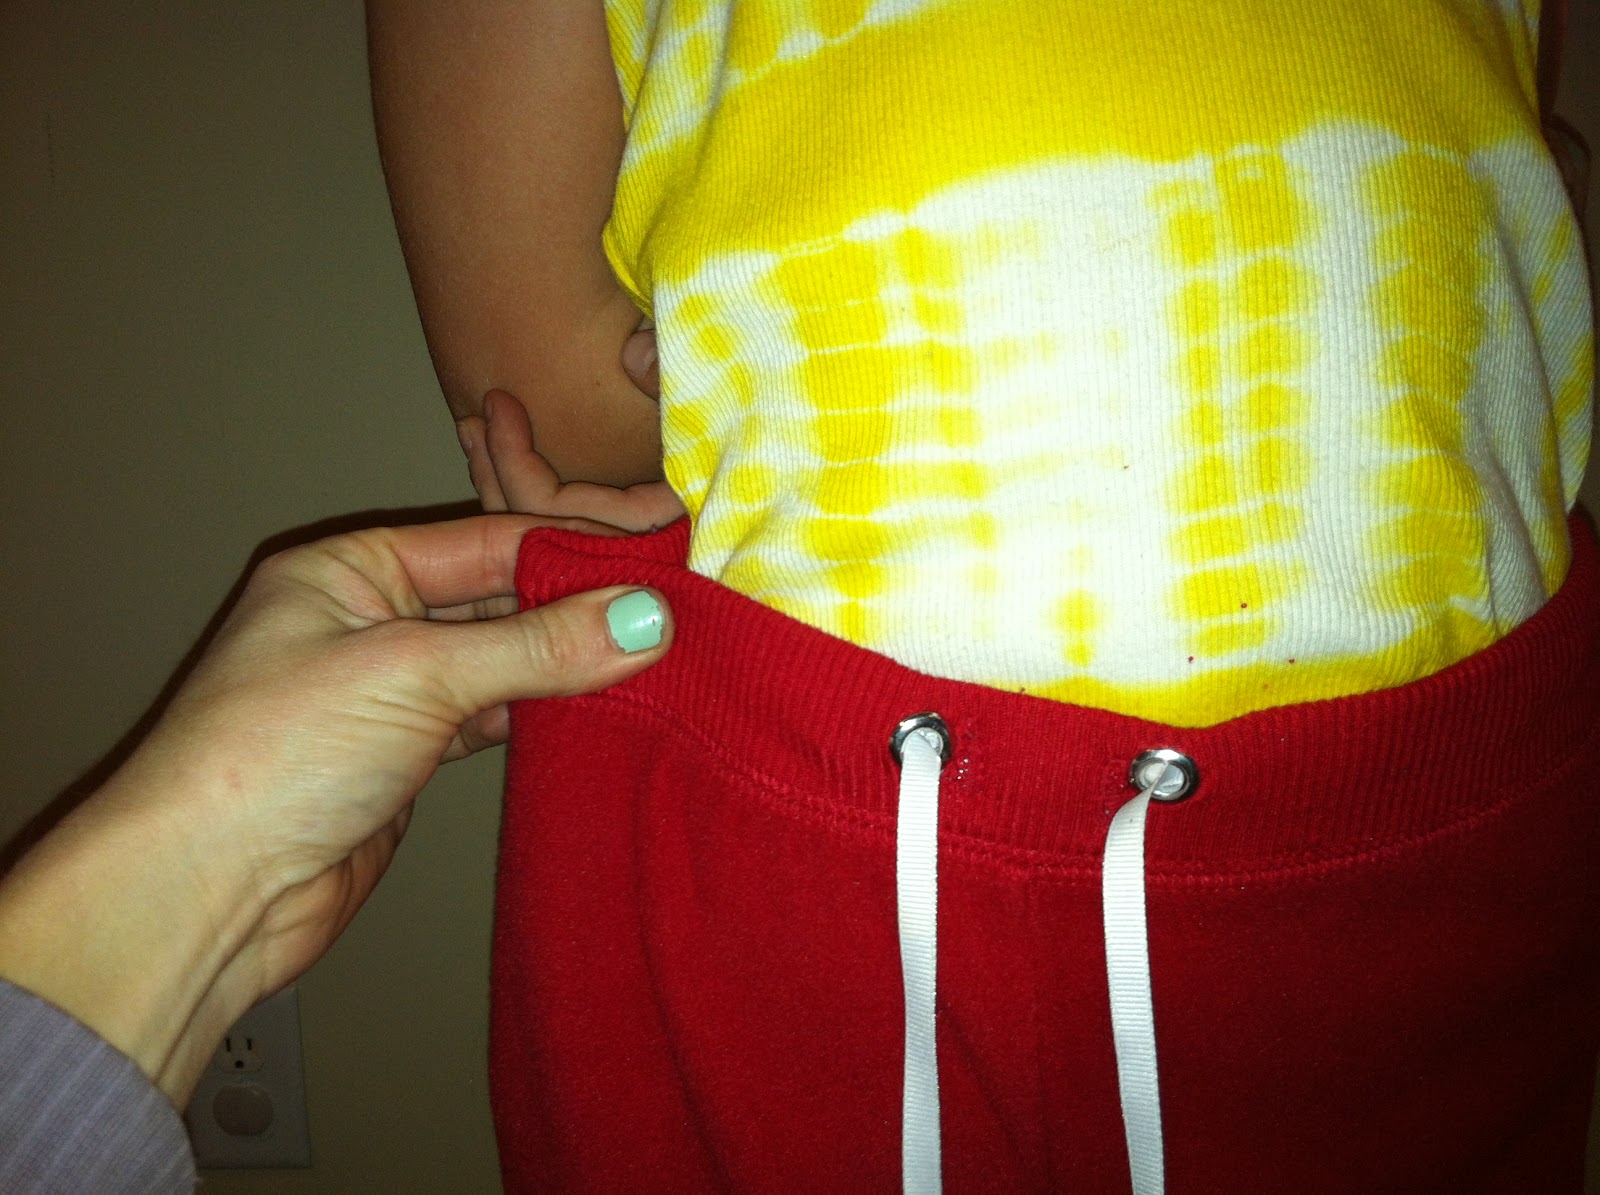
Okay here is what the pants now look like with the new drawstring put through the existing waistband and tied in a bow. As you can see the bow covers the original stitches where I removed the "faux drawstring"

Then the last thing I do is lightly touch a flame to the end of the ribbon tie to keep it from fraying.
Here is my daughter wearing the fixed pants. No safety pin gap and no thick tucks necessary!
Adjustable drawstring added to existing elastic waistband. These pants are not going to fall down!!